


Book An
Appointment
Lorem ipsum dolor sit amet, consectetur adipiscing elit, sed do eiusmod tempor incididunt ut labore et
Our Services
Last Updated: October 29, 2026
Quick Summary
A shower valve replacement usually takes a few hours for most homes, and sometimes a full day when the wall is hard to open. A cartridge swap in an accessible wall is quick, while a full valve body replacement takes longer because the wall must be opened and the connections redone.
- Access to the wall is the biggest factor, since a tiled wall with no panel adds hours.
- Cartridge swaps are faster and cheaper than full valve body replacements.
- Sweat-soldered copper takes longer than push-fit PEX connections.
- Open the main water slowly after the job to avoid blowing a fresh solder joint.
- Confirm whether a leak comes from the handle area or the wall to pick the right fix.
Table of Contents
- Signs of a Bad Shower Valve
- Tools Needed for Shower Valve Replacement
- Step-by-Step Shower Valve Replacement Process
- Troubleshooting a Stuck Shower Valve
- Shower Valve Replacement Cost by Method
- Booking a Shower Valve Replacement in Pinellas County
- Frequently Asked Questions
If you’re asking how long does shower valve replacement take, the honest answer is a few hours for most homes, and sometimes a full day when the wall is hard to open. The timing depends far more on access and the type of valve than on the valve itself. Knowing what drives the clock helps you plan your morning and avoid surprises.
A simple cartridge swap in an open wall can be quick. A full valve body replacement usually takes longer because the wall has to be opened, the old body cut out, and the new one soldered or pushed into place. Add time for leak testing and patching the wall, and a full-body job can take considerably longer than a cartridge swap.
Here is what usually sets the pace:
- Access: A wall with an existing access panel moves quickly. A tiled wall with no panel adds hours.
- Pipe material: Sweat-soldered copper takes longer than push-fit PEX connections.
- Valve type: Cartridge swaps are fast. Full bodies are slower.
- Condition of the old parts: Corroded or calcified fittings can add time when they refuse to come loose.
Most of the time lost on this job comes from opening the wall, not from installing the valve.
A common mistake is assuming the job is just a valve swap. Once the wall is open and the pipes are visible, the work can change. Plan extra time, and ask about the scope before the work starts.
Signs of a Bad Shower Valve
A bad shower valve usually shows itself in the water. You may notice a drip that won’t stop, water temperature that jumps between hot and cold, or a handle that feels loose or hard to turn. Low water pressure at only the shower is another common sign.
Watch for these signs:
- Water keeps dripping after you turn the handle off
- Temperature swings suddenly while you shower
- The handle wobbles, sticks, or spins without changing the flow
- Visible water staining or damp drywall behind the shower wall
- Shower pressure drops only at that fixture
These symptoms can also come from a clogged showerhead or a worn washer, so confirm the cause before you open a wall. Water damage behind the wall is worth catching early, because a slow leak can rot framing over time.
Tools Needed for Shower Valve Replacement
Most jobs need a basic set of hand tools and a few plumbing-specific items. Gather everything before you shut off the water so you aren’t stuck with a half-finished bathroom.
- Adjustable wrench and pipe wrench
- Screwdrivers and an Allen key for the handle set screw
- Cartridge puller for stuck cartridges
- Pipe cutter or reciprocating saw for opening the wall
- Plumber’s grease and thread sealant
- O-rings and replacement cartridge or valve body
- For copper: torch, flux, and solder
- For PEX: crimp or push-fit fittings
Pricing depends on the parts and valve type, so contact CW Plumbing for a quote before you buy. Our Pinellas County plumbing services cover shower valve work from diagnosis through final testing.
Step-by-Step Shower Valve Replacement Process
Work in this order to avoid leaks and wasted time.
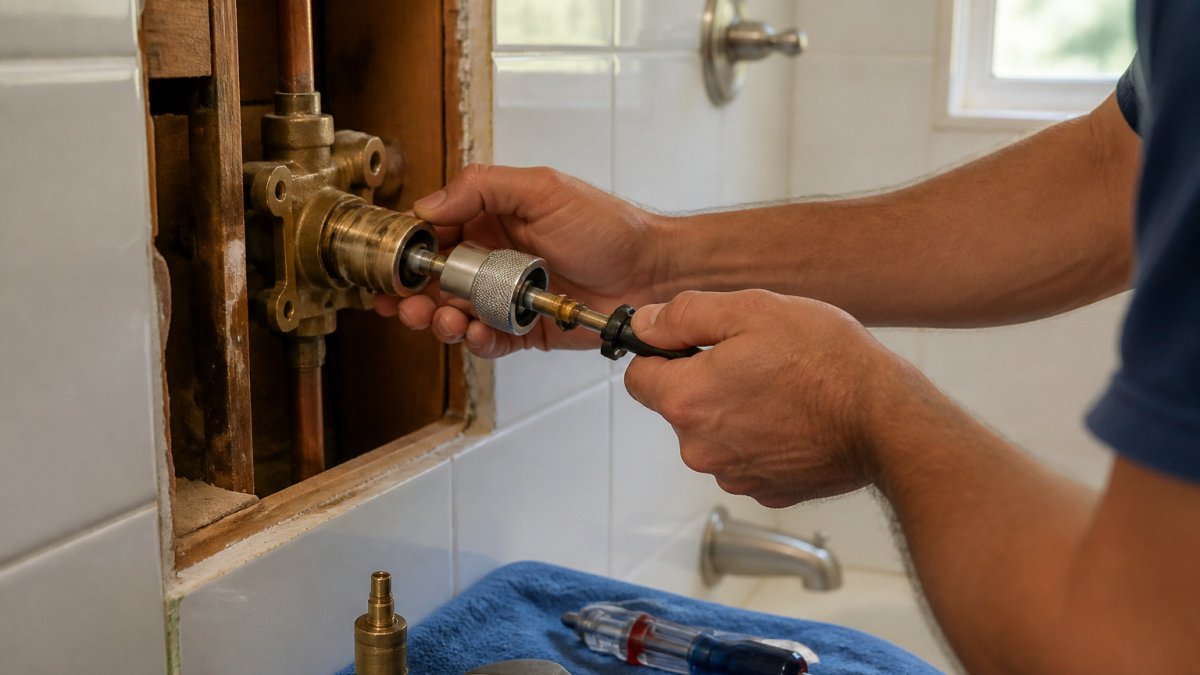
- Turn off the water at the main or at the local shut-off valve.
- Open the shower to drain any remaining pressure.
- Remove the handle and escutcheon plate to expose the valve.
- Cut the access panel or wall opening as needed.
- Remove the old cartridge or valve body.
- Install the new valve, using thread sealant or grease as the valve requires.
- Connect the pipes by soldering copper or joining PEX fittings.
- Turn the water back on slowly and check every joint.
- Test the valve at hot, cold, and mixed settings for at least 10 minutes.
- Patch the wall, reinstall the trim, and clean up.
Watch out: Turning the main water back on too fast can blow a fresh solder joint or loosen a push-fit connection. Open it slowly and check each fitting.
Shutting Off the Water Supply and Removing the Handle
Start by closing the shut-off valve for the shower, or the main if the local valve is missing or stuck. Test the water by opening the shower briefly. If water still comes out, the supply is not fully closed.
Next, remove the handle. Most handles hide a set screw under a small cap. Use an Allen key, then pull the handle straight off. Remove the escutcheon plate to reach the valve nut underneath.
Cartridge Replacement vs. Full Valve Body Replacement
These two jobs are often confused, and that confusion makes time estimates unreliable.
A cartridge replacement swaps only the inner mechanism. It is faster and cheaper, and works when the valve body is sound and the pipes are in good shape.
A full valve body replacement removes the entire valve from the pipes. It is needed when the body is cracked, corroded, or leaking from the connections. Expect more wall work and more soldering or fitting time.
Ask yourself one question before you start: is the leak coming from the handle area, or from the wall behind it? A handle-area leak often points to a cartridge. A wall-side leak usually points to the body.
Troubleshooting a Stuck Shower Valve
A stuck valve can stop a job cold. Corrosion and mineral buildup, called calcification, can lock the cartridge in place.
Try these steps before you force anything:
- Soak the valve area with a vinegar solution to loosen mineral deposits
- Use a cartridge puller rather than pliers, which can crack the body
- Tap the valve nut lightly with a rubber mallet to break the seal
- Check that the water is fully off, since pressure can make a stuck part harder to move
If the cartridge still won’t budge after a careful attempt, the valve body may need replacing. Forcing it can damage the pipes behind the wall.
Shower Valve Replacement Cost by Method
Cost tracks the method, not the valve brand. The two scopes below are the ones that matter, and the ranges reflect typical parts-plus-labor pricing for a standard tub/shower valve in an accessible wall. Treat them as planning bands, not quotes, pipe material, wall finish, and local labor rates move the number. For a broader view of how valve work fits into a renovation budget, see our bathroom remodel plumbing cost guide.
Cartridge replacement
A cartridge swap is the low-cost path because the wall usually stays closed and the pipes stay connected.
- Part: roughly $20-$60 for a brand-matched cartridge, depending on valve series.
- Labor: typically 1-2 hours at a standard plumbing rate.
- All-in planning band: commonly in the low hundreds when no wall opening is needed.
If there is no access panel, add the cost of cutting and patching drywall or tile. Tile repair is the wildcard, matching an older tile can cost more than the plumbing work itself.
Full valve body replacement
A full body replacement is the higher-cost path because the wall opens, the body is cut out, and new connections are made.
- Valve body and trim: roughly $150-$500 depending on valve technology (pressure-balancing vs. thermostatic) and finish.
- Labor: typically 4-8 hours, more for sweat-soldered copper.
- Wall repair: drywall patch and paint, or tile repair if the wall is tiled.
- All-in planning band: commonly in the mid-hundreds to low four figures, with tile repair and copper soldering pushing toward the top.
What moves the price
- Pipe material: PEX crimp or push-fit connections are faster than sweat-soldered copper, and labor follows.
- Wall access: an existing access panel saves hours; a tiled wall with no panel adds cutting, patching, and finish work.
- Valve technology: a basic pressure-balancing valve costs less than a thermostatic valve with separate temperature control.
- Condition of old fittings: corroded or calcified connections add time and sometimes require cutting back pipe.
- Permit and inspection: where required for a body replacement, the permit fee and inspection scheduling add cost and calendar time.
Budget the cartridge swap in the low hundreds and the full body replacement in the mid-hundreds to low four figures. Ask what each bid includes before you compare them.
How to compare bids
Ask for the quote split into parts, labor, wall repair, and permit. Two bids that look different often differ only in whether wall repair is included. Confirm the leak-test duration and who handles patching before you sign, so the final invoice matches the number you planned around.
The table below sets the cartridge and full body replacement planning bands side by side, so you can scan what each option typically costs.
| Method | Typical labor | Planning band |
|---|---|---|
| Cartridge replacement | 1-2 hours | Low hundreds |
| Full valve body replacement | 4-8 hours | Mid-hundreds to low four figures |
| Valve body and trim (part) | Included above | $150-$500 |
| Cartridge (part) | Included above | $20-$60 |
Booking a Shower Valve Replacement in Pinellas County
If you’d rather not handle the wall work yourself, book an appointment with a local team that can diagnose the problem and tell you whether a cartridge or full body is the right fix.
Ask questions up front. Who is licensed and insured for the work? Ask for proof before work begins. How long will the bathroom be out of use? What does the quote include for wall repair and testing?
Frequently Asked Questions
How long does shower valve replacement take?
Most cartridge swaps take two to three hours. A full valve body replacement often takes four to eight hours, depending on wall access and pipe type.
Can I replace a shower valve myself?
Many homeowners with basic tools can swap a cartridge. Full body replacements involve soldering or fitting pipes and opening walls, so a licensed plumber is often the safer choice.
Why does my shower valve keep dripping?
A worn cartridge or failed O-rings are common causes. Confirm the source before opening a wall.
Do I need a permit to replace a shower valve?
Requirements vary by jurisdiction and scope of work. Check with your local building department before starting a full body replacement.
Frequently Asked Questions
How long does it take to replace a shower valve?
A straightforward cartridge replacement in an accessible wall is usually quicker than a full valve body replacement. A full valve body replacement, especially one that requires opening tile or drywall, takes longer and may extend beyond a single day if the wall needs repair and time to dry. Old, corroded or calcified fittings can add time. Plan for the longer estimate if the shower is tiled or the valve is original to a home built decades ago.
Do I need to turn off the main water supply to replace a shower valve?
Shutting off the water is required before you remove any part of the valve. Many bathrooms have dedicated shut-off valves under the sink or behind an access panel, which let you isolate the shower without affecting the rest of the house. If the shower has no local shut-off, you will need to close the main supply. Open the shower to release residual pressure before you start work, and confirm the water is off with the handle turned on.
Can I replace a shower valve without removing the tile?
Sometimes. If the valve is accessible from behind through a plumbing access panel in an adjacent closet or wall, a cartridge swap can often be done without touching the tile. Replacing the full valve body from the front almost always requires removing tile and sometimes backer board, then patching and re-tiling. Your plumber can check access before quoting, which is the most reliable way to know how much work the job will involve.
How do I know if my shower valve needs replacement?
Common signs include water that drips from the spout or showerhead after the valve is closed, a handle that is stiff or loose, water temperature that fluctuates suddenly, low pressure only at the shower, or visible water staining on the wall or ceiling below. Persistent leaks behind the wall can damage framing and drywall, so address them promptly. If you notice any of these symptoms, schedule an inspection to confirm whether a cartridge or the full valve needs to be replaced.
