


Book An
Appointment
Lorem ipsum dolor sit amet, consectetur adipiscing elit, sed do eiusmod tempor incididunt ut labore et
Our Services
Quick Summary
Installing bathroom vanity plumbing means shutting off the water, removing the old trap and supply lines, mounting the cabinet, then connecting the drain and supplies and testing each joint in stages. Confirm the existing rough-in lines up with the new vanity before you buy or mount anything.
- Shut off the water first, then open the faucet to relieve pressure before disconnecting lines.
- Measure drain height, drain offset, and supply stub spread against the cabinet’s interior clearance before buying.
- Hand-tighten slip nuts, then give each a final quarter turn; over-tightening cracks plastic washers and nuts.
- Test supply connections with valves closed first, then the faucet, drain, and a full-basin load test.
- Hire a licensed plumber if the rough-in is damaged, the drain needs rerouting, or a double-sink drain line is involved.
Table of Contents
- Tools and Materials You Need for Bathroom Vanity Plumbing
- Planning Your Bathroom Vanity Plumbing Layout and Rough-In Measurements
- Shutting Off Water and Removing the Old Sink, Vanity, and P-Trap
- How to Install a Bathroom Vanity Against a Wall
- Connecting Bathroom Vanity Plumbing Through the Floor
- Testing for Leaks and Troubleshooting Drainage Problems
- What a Plumber Charges to Install a Bathroom Vanity and When to Hire One
- Frequently Asked Questions
Tools and Materials You Need for Bathroom Vanity Plumbing
Last Updated: November 3, 2026
Bathroom vanity plumbing is manageable for a handy homeowner with the right tools: disconnect old lines, set the cabinet, and tighten connections that must not leak.
Basic hand tools:
- Adjustable wrench or pipe wrench
- Slip-joint pliers
- Basin wrench (for tight spots behind the faucet)
- Flat-head and Phillips screwdrivers
- Tape measure and level
- Pencil and stud finder
- Drill with bits for wood and masonry
Plumbing parts and materials:
- Drain assembly with pop-up stopper and tailpiece
- P-trap and U-bend (sized to match your drain pipe)
- Flexible or braided water supply lines
- Shutoff valves (angle stops) if your wall lacks them
- Plumber’s putty or silicone sealant
- Teflon tape for threaded connections
- Mounting hardware and wall anchors
Check the diameter of your existing drain pipe and supply lines before buying parts. Check the drain pipe size before buying parts, since mismatched fittings can cause slow leaks.
| Category | Item | Why You Need It |
|---|---|---|
| Tools | Basin wrench | Reaches tight nuts behind the faucet |
| Tools | Stud finder | Locates solid mounting points |
| Parts | P-trap | Keeps sewer gases out of the room |
| Parts | Supply lines | Connects hot and cold water to the faucet |
| Sealant | Plumber’s putty | Seals the drain flange to the sink |
Keep a bucket and old towels nearby; residual water always drains from the lines when you disconnect them.
Planning Your Bathroom Vanity Plumbing Layout and Rough-In Measurements
Good planning prevents most installation problems, and the planning that matters most is comparing the existing rough-in to the vanity you intend to buy.
Measure the existing rough-in in this order:
- Drain height. Measure from the finished floor to the center of the drain opening. Most vanity drains are set so the P-trap can run horizontally into the wall or drop through the floor without binding.
- Drain offset from the wall. Measure from the finished wall surface to the center of the drain. This tells you how far the tailpiece and trap will sit inside the cabinet.
- Supply stub height and spread. Measure floor-to-center for both the hot and cold stubs, then the distance between their centers. That distance is the faucet spread the rough-in supports.
- Supply offset from the wall. Note how far the stubs project; stubs that project too far can foul the cabinet back or the drawer box.
- Cabinet envelope. Record the vanity width, depth, and height, plus the interior clearance behind the drawers and doors.
Faucet spread compatibility. Faucets come in several configurations, including single-hole, centerset, and widespread, so match the faucet to the sink’s hole pattern.
When the rough-in does not align, you have four options, in rough order of cost and disruption:
- Flexible supply lines absorb small horizontal and vertical offsets between stubs and faucet inlets. They do not fix a drain in the wrong place.
- An offset or flexible tailpiece can bridge a small horizontal mismatch between drain and P-trap, but keep the trap level and avoid long horizontal runs that trap water.
- Cabinet modification (notching a back panel, removing a drawer box, or cutting an access opening) solves clearance problems without touching pipes.
- Rerouting the drain or supplies is the durable fix when the rough-in is far off, but it usually means opening the wall and may require a permit. This is the point where you decide whether to call a plumber.
Single- versus double-sink layouts. A single-sink vanity needs one drain and one faucet spread. A double-sink vanity needs two drains that typically join a shared drain line through a wye fitting.
Watch out: a rough-in that looks close on a tape measure can still fail at the trap, because the trap needs a level run and a vertical drop of only a few inches.
Shutting Off Water and Removing the Old Sink, Vanity, and P-Trap
Always shut off the water before you disconnect anything. Look for the shutoff valves under the existing sink. If they are stiff or do not close fully, shut off the main water supply to the house instead. Then open the faucet to relieve remaining pressure and drain the lines.
Once the water is off, follow this order:
- Place a bucket under the P-trap and loosen the slip nuts by hand or with pliers.
- Remove the P-trap and empty any standing water.
- Disconnect the supply lines at the shutoff valves.
- Remove the faucet and drain assembly from the sink.
- Unscrew the vanity from the wall and lift the old sink or cabinet out.
Be careful removing an old vanity that is glued or caulked to the wall. Cut the caulk with a utility knife before pulling. If the cabinet resists, check for hidden screws in the back or under the countertop.
Pipe connections in older homes can corrode and fuse. Apply steady pressure rather than forcing a wrench, since excessive force can crack a fitting or damage the wall pipe.
How to Install a Bathroom Vanity Against a Wall
Once the old vanity is out, prepare the wall. Check for water damage, soft drywall, or mold.
Next, mark the wall for mounting. Use a stud finder to locate the studs, and mark a level line at the height you want the top of the vanity.
Position the vanity so the drain and supply openings line up with the rough-in pipes. Confirm it is level in both directions.
A common mistake is securing the vanity before checking the drain position. Test-fit the sink first, then drill and mount, avoiding having to remove and reset a heavy cabinet.
After mounting, apply sealant around the back and sides of the countertop where it meets the wall to keep water from running behind the vanity and damaging the subfloor.
Connecting Bathroom Vanity Plumbing Through the Floor
Connecting the plumbing is where most leaks happen, so take your time with each joint. Start with the drain.
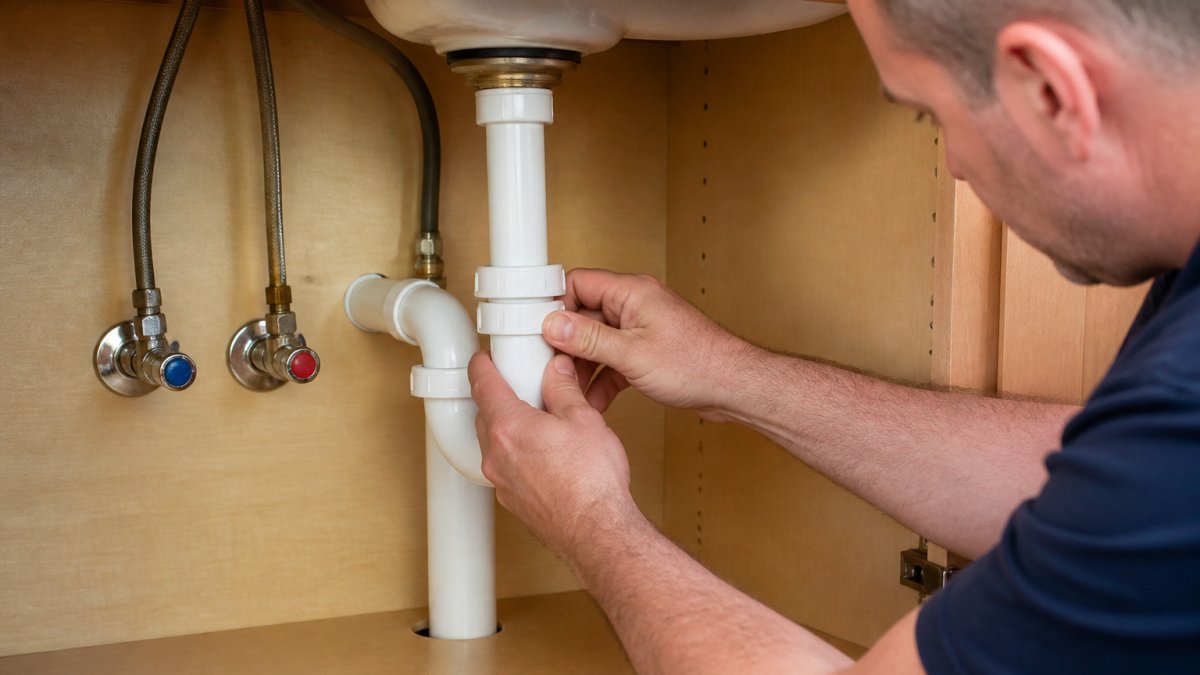
For the water supply, connect the flexible lines from the shutoff valves to the faucet inlets. Hand-tighten first, then give each nut a final quarter turn with a wrench. Over-tightening can crack plastic nuts and create leaks.
Some installations route the supply lines through the floor instead of the wall.
!A homeowner’s hands tightening a slip joint nut on a P-trap beneath an open bathroom vanity, with a shutoff valve and supply lines visible in the cabinet
Watch out: leaving the shutoff valves closed after connecting the lines will cause a dry-run test to fail. Open the valves slowly, one at a time, while watching each joint.
Testing for Leaks and Troubleshooting Drainage Problems
Test in stages so you know which connection is responsible when something drips; a single full-pressure test can leave water in several places at once, making the source hard to find.
Stage 1: Supply side, valves closed. Open the shutoff valves slowly, one at a time, with the faucet still closed. Watch each supply connection at the valve and faucet inlet.
Stage 2: Faucet and drain flange. Open the faucet and let it run for several minutes, then check under the sink.
Stage 3: Drain and trap under flow. Run water down the drain and watch the slip joints at the tailpiece, trap, and waste arm.
Stage 4: Load test. Fill the sink and release the stopper so a full basin drains at once.
Diagnose by symptom, not by guesswork:
- Drip at a slip joint: washer reversed, hardened, or missing; or the nut is cross-threaded. Disassemble, inspect, reseat.
- Drip at a supply nut: ferrule not seated, or the nut is loose. Tighten a quarter turn, then replace the ferrule if it persists.
- Gurgling after the sink drains: the trap is being siphoned because the vent is blocked or missing. Check that the trap arm connects to a vented drain and that the vent stack is clear.
- Slow drainage: the trap or the drain line is partly blocked, or the trap arm has too little slope. Clear the trap first, then confirm the arm slopes downward toward the wall.
- Sewer smell in the cabinet: the trap has lost its water seal, often because the fixture is unused or the trap is misaligned. Run water to restore the seal and check the trap level.
- Water at the cabinet floor after use: look for a joint that only leaks under flow, and check that the trap arm is not pushed too far into the wall fitting, which can block the vent.
Recheck after real use. The most reliable leak test is a week of normal use.
What a Plumber Charges to Install a Bathroom Vanity and When to Hire One
Many homeowners can complete a standard vanity swap themselves. However, a licensed plumber is worth calling when the rough-in is damaged, the drain needs rerouting, or the project involves a double-sink setup with new drain lines. Pricing depends on job complexity, the condition of existing pipes, and how far the work extends from the current layout.
Hire a professional if you notice signs of hidden water damage, if the drain line has repeated clogs, or if the work touches gas lines or the main sewer connection. Local permit requirements may also apply for changes to drain or supply lines, so check with your local building department before starting significant work.
If you would rather skip the trial and error, book a plumbing service in Pinellas County. For a bathroom renovation that includes a new vanity, see how CW Plumbing handles full bath remodels. If a new drain keeps clogging after installation, learn how to stop recurring drain clogs for good, and if the problem persists, a sewer camera inspection in Pinellas County can locate the blockage in the line.
Frequently Asked Questions
Can I install a bathroom vanity myself?
Many homeowners with basic tools can install a bathroom vanity themselves, especially a replacement in the same location with existing supply lines and drain. The work becomes harder when you must move the drain, add new supply lines, cut into the floor, or open walls to reach the plumbing. Confirm your local permit requirements in Pinellas County before starting, since some plumbing changes require an inspection. If you find corroded pipes, a cracked drain, or signs of water damage behind the wall, stop and call a licensed plumber. Ask CW Plumbing for a quote if you prefer professional installation.
Do I need a plumber to install a bathroom vanity?
You do not always need a plumber, but you do need to follow plumbing codes. Simple swaps with matching supply lines and drain locations are common DIY projects. Moving the drain, extending supply lines, or changing venting usually calls for a licensed professional. A plumber can also confirm that connections are sized correctly and that the work passes inspection. For pricing on any part of the job, contact CW Plumbing directly, since costs depend on the scope of work.
How do I check for leaks after installing a bathroom vanity?
Turn the water supply back on slowly and watch each connection, including the shutoff valves, faucet supply lines, and drain joints. Run the faucet for several minutes on hot and cold, then let the sink fill and drain. Dry the joints with a paper towel and check again after a few minutes, since slow leaks may only appear under pressure. Check the cabinet floor for moisture. If you see drips at a slip joint, tighten it gently by hand plus a quarter turn with pliers, and avoid overtightening plastic fittings.
How much would a plumber charge to install a bathroom vanity?
A plumber’s cost for installing a bathroom vanity depends on the vanity size, whether the drain and supply lines are being relocated, the condition of existing pipes, and any wall or floor repairs needed. Some jobs are straightforward replacements, while others require rough-in work. CW Plumbing does not publish fixed prices for this service, so the best way to get an accurate number is to request a quote that reflects your specific project.
