


Book An
Appointment
Lorem ipsum dolor sit amet, consectetur adipiscing elit, sed do eiusmod tempor incididunt ut labore et
Our Services
Table of Contents
- Why Plumbing Drives Your Kitchen Remodel Timeline and Budget
- Your Kitchen Remodel Plumbing Checklist: What to Inspect First
- Moving Plumbing During a Kitchen Remodel: Costs and Constraints
- Kitchen Island Plumbing Requirements: What You Need to Know
- Kitchen Remodel Plumbing Cost: What Drives the Price
- Permits, Code Requirements, and Inspections
- Appliance Hookups: Dishwasher, Refrigerator, and Disposal
- Water Efficiency, Leak Prevention, and Accessibility
- Frequently Asked Questions
Last Updated: October 12, 2026
Why Plumbing Drives Your Kitchen Remodel Timeline and Budget
Here’s the core tension: your kitchen layout is flexible, but your drain lines mostly are not. Water supply lines can be rerouted with relative ease. Drain lines depend on gravity, slope, and where the main stack runs.
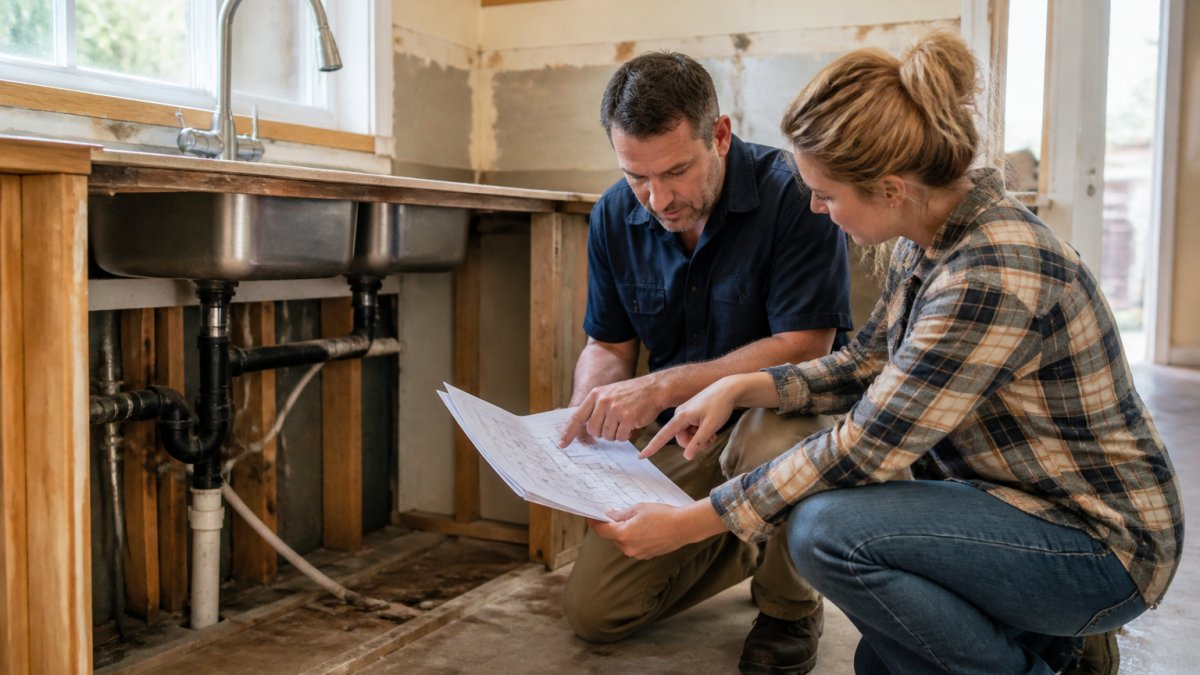
The Real Cost of Moving vs. Keeping Your Sink
Keeping the sink in place is almost always cheaper and faster. Moving it triggers new supply lines, a new drain run, possible venting changes, and often floor or wall repair. A common mistake is designing the kitchen around the island first and the plumbing second. Reverse that order. Design around the drain stack, then build the layout outward.
If you finalize cabinets before confirming the drain location, you risk paying to cut open a finished floor or return custom cabinetry. Confirm plumbing rough-in before the cabinet order goes in.
Your Kitchen Remodel Plumbing Checklist: What to Inspect First
A kitchen remodel plumbing checklist starts with inspection, not demolition. Before you commit to a layout, a licensed plumber should assess the existing plumbing system, water pressure, shutoff valves, and pipe condition. This is the step most homeowners skip, and it’s the one that surfaces the surprises.
Supply Lines, Shutoff Valves, and Water Pressure
Supply lines deliver hot and cold water to the sink, dishwasher, and refrigerator. Older homes often have undersized or corroded lines that restrict flow. Check that your shutoff valve actually closes fully; a valve that won’t seal turns a small repair into a flooded kitchen. Water pressure should be measured before you add fixtures, since a new dishwasher or fridge line can drop pressure at the tap.
Drain Lines, Venting, and Pipe Condition
Drain lines carry wastewater away, and they rely on proper slope. Vent pipes let air into the system so water drains without gurgling or siphoning. Cast iron and older galvanized pipes corrode from the inside, narrowing over decades. If your drain line is near the end of its life, replacing it during the remodel costs far less than tearing out new cabinets later.
| Inspection Item | What to Check | Why It Matters |
|---|---|---|
| Shutoff valves | Full closure, no drips | Prevents flooding during work |
| Water pressure | Consistent at all fixtures | New appliances can drop flow |
| Supply lines | Corrosion, sizing | Restricts hot/cold delivery |
| Drain lines | Slope, material, buildup | Poor drainage, future clogs |
| Vent pipes | Blockage, code compliance | Gurgling, slow drains |
Moving Plumbing During a Kitchen Remodel: Costs and Constraints
Moving plumbing during a kitchen remodel is where budgets quietly expand. The cost depends on distance from the existing stack, whether the floor must be opened, and whether venting needs to change.
Trade coordination matters here. Plumbing rough-in must happen before drywall, and inspection must pass before cabinets and countertops go in. Sequence it wrong and you’ll be reopening finished walls.
Schedule your plumbing rough-in inspection before the drywall crew arrives. Inspectors need to see the pipes, and a failed inspection after drywall means demolition you already paid for.
Kitchen Island Plumbing Requirements: What You Need to Know
Kitchen island plumbing requirements are stricter than most homeowners expect, because an island sink sits far from the wall where the drain stack usually runs. You need a water supply, a drain, and, critically, venting. In many cases the island needs its own vent solution, since a standard vent pipe can’t run up through open kitchen space.
Venting Challenges for Island Sinks
Island sinks often use an air admittance valve or a loop vent to satisfy plumbing code without a traditional vent stack. These solutions work, but they must be installed correctly and sized to the drain. A common mistake is treating an island drain like a wall drain. It isn’t. The longer horizontal run needs correct slope to keep waste moving.
The island sink is the most expensive plumbing feature in most remodels. Decide early whether you truly need one, because adding it later is far costlier than planning for it up front.
Kitchen Remodel Plumbing Cost: What Drives the Price
Most guides tell you plumbing is expensive and leave it there. That’s not useful when you’re staring at a bid. What actually helps is understanding how cost scales by task, so you can see where your money goes and where a design change saves thousands.
How Cost Scales by Task
Plumbing cost isn’t a flat rate. It’s a stack of discrete tasks, each with its own labor and material profile. The pattern most contractors see looks like this:
- Keeping the sink and appliances in place. This is the lowest-cost scenario. You’re paying for new supply lines, new shutoffs, a new faucet and drain assembly, and finish connections. No demolition, no rerouting, no inspection surprises.
- Replacing the faucet and supply lines only. A finish-level job. No wall or floor opening, no permit in most jurisdictions, and the shortest labor window.
- Relocating the sink a few feet along the same wall. Adds a new drain run and supply extensions. Cost climbs because the wall opens, the drain must maintain slope to the existing stack, and the wall must be closed and finished.
What Pushes a Quote Up Mid-Job
The biggest cost surprises come from what’s behind the wall, not from the fixtures you picked. Common drivers:
- Hidden pipe damage or corrosion discovered once the wall or floor opens.
- Undersized supply lines that can’t support the new fixture load and must be upsized.
- Drain slope problems that force rerouting rather than a simple extension.
How to Get a Real Number
Because scope varies so much, a per-task chart from any single source will mislead you. The honest approach is a site assessment: a licensed plumber reviews your existing infrastructure, confirms what can stay and what must move, and gives you a written scope with line items. Ask for that scope in writing, and ask specifically what’s excluded, demolition, drywall repair, and finish work are the items most often left off a plumbing bid and added later.
Ask your plumber to price two versions: sink stays, and sink moves. The delta between those two numbers is the real cost of your layout idea, and it’s the number that should drive your design decision.
For current pricing, check our appointment page or request a quote. Unexpected costs almost always trace back to hidden pipe damage or code corrections found mid-job, which is exactly why the inspection step comes first.
Permits, Code Requirements, and Inspections
“It depends on your jurisdiction” is technically true and practically useless. What you actually need is a way to know whether your specific project will trigger a permit, and what to expect if it does. Here’s a working framework.
When a Permit Is Usually Triggered
Permit thresholds are set locally, but the pattern across most building departments is consistent. A permit is typically required when work goes beyond a like-for-like fixture swap. The common triggers:
- Relocating a sink, drain, or supply line, any change to the drain, waste, and vent (DWV) system generally requires a permit.
- Adding a new fixture or appliance connection where none existed (new island sink, new refrigerator line tied to a new tap).
- Replacing a section of drain or supply piping rather than just a fixture.
A simple faucet or shutoff valve replacement usually does not require a permit. Anything that changes the system’s layout or capacity usually does.
What Each Inspection Covers
Most jurisdictions run two inspections on a kitchen plumbing job:
- Rough-in inspection, happens after pipes are installed but before drywall or cabinets close the wall. The inspector verifies pipe material, sizing, slope on drain runs, venting configuration, and that supply and drain locations match the approved plan.
- Final inspection, happens after fixtures, appliances, and shutoffs are set. The inspector confirms connections are leak-free, traps are correct, shutoffs are accessible, and the installation matches what was approved.
Some jurisdictions add a separate gas inspection if you’re moving a gas range or adding a gas line, and a framing or insulation inspection may be sequenced around the plumbing rough-in.
A Practical Permit Checklist
Before work begins, confirm:
- Who is pulling the permit, you or the licensed plumber. Get it in writing.
- Whether the permit covers rough-in and final, or just one.
- What the inspection windows are, and how much lead time is needed to schedule.
Why Skipping Permits Backfires
Unpermitted plumbing work can void homeowner’s insurance coverage for a related water-damage claim, surface during a pre-sale inspection, and force a buyer to demand retroactive permitting or a price reduction. The cost of pulling a permit is almost always smaller than the cost of discovering the work was never inspected.
If a contractor offers to skip the permit to “save you money,” treat that as a red flag. It shifts the risk entirely onto you, and the risk doesn’t expire when the job ends.
A licensed plumber knows the local code and pulls the right permits. Confirm responsibility before work begins, and keep copies of every inspection sign-off for your records.
Appliance Hookups: Dishwasher, Refrigerator, and Disposal
Appliance hookups are the finishing details that trip up DIY remodels. The dishwasher needs both a hot water supply and a drain connection, usually tied to the sink drain or disposal.
Each hookup needs its own connection point and shutoff where required. A common mistake is running a refrigerator line without a shutoff valve, which makes a simple leak repair a major headache.
Water Efficiency, Leak Prevention, and Accessibility
Water-efficient fixtures reduce long-term cost and meet current standards. Low-flow faucets and efficient dishwashers cut water use without sacrificing performance.
Accessibility matters, too. Lever-style faucets, pull-out sprayers, and comfortable counter heights make the kitchen easier to use for every member of the household.
For homeowners and property managers across Pinellas County, CW Plumbing handles the full scope, from advanced diagnostics like sewer camera inspections and hydro jetting to complete kitchen and bathroom remodeling.
Frequently Asked Questions
What plumbing should be considered when remodeling a kitchen?
Start by inspecting your existing supply lines, drain configuration, and venting. Determine whether the sink stays in place or moves, since relocation affects both drain slope and vent routing. Check water pressure and shutoff valve condition. Plan appliance hookups for dishwasher, refrigerator ice maker, and garbage disposal. Confirm local code requirements and pull permits before demolition begins. A licensed plumber can assess pipe condition and flag issues that will affect your budget and timeline.
Can you move a sink during a kitchen remodel?
Yes, but moving a sink is one of the more expensive plumbing changes. The drain line must maintain proper slope to the main waste stack, and the vent pipe must be rerouted or a new one installed. If the new location is far from the existing drain, you may need to open floors or walls. Costs depend on distance, accessibility, and whether the new layout works with your home’s existing plumbing infrastructure. Get a plumber’s assessment before finalizing your kitchen layout.
How much does it cost to move plumbing in a kitchen?
Pricing depends on the scope: how far the sink moves, whether walls or floors need opening, and if venting must be reconfigured. Simple relocations along the same wall cost less than moving a sink to an island, which requires new supply lines, a drain with proper slope, and often a specialized vent solution. Labor, permit fees, and material costs vary by region and project complexity. Request a detailed quote from a licensed plumber after an on-site assessment.
Do I need a plumber to remodel my kitchen?
For any work involving supply lines, drain lines, venting, or appliance hookups, you need a licensed plumber. Many jurisdictions require permits for plumbing changes, and inspections verify the work meets code. A plumber also ensures proper slope on drain lines, correct venting to prevent sewer gas issues, and safe connections that won’t leak behind finished walls. DIY plumbing in a remodel often leads to costly repairs and failed inspections.
Should I replace old pipes during a kitchen remodel?
If your home has galvanized steel or polybutylene pipes, replacement is worth considering while walls are open. Galvanized pipes corrode internally, reducing water pressure and eventually leaking. Polybutylene has a history of failure. Copper and PEX are common replacements. Even with newer pipes, inspect shutoff valves, supply lines, and drain connections for wear. Replacing accessible pipes during a remodel costs far less than opening finished walls later.
How do I plan plumbing for a kitchen island?
Island plumbing requires supply lines for hot and cold water, a drain line with proper slope to the main stack, and a vent solution. Because islands sit away from walls, venting often uses an air admittance valve or a loop vent, depending on local code. You also need electrical for disposal and dishwasher if included. Plan the island’s plumbing before pouring concrete or installing flooring. A plumber should review your layout early to confirm feasibility and cost.
Do kitchen remodels require plumbing permits?
Most jurisdictions require permits for plumbing work that alters supply lines, drain lines, or venting. Simple fixture replacements like swapping a faucet may not need a permit, but relocating a sink or adding an island sink typically does. Permits trigger inspections that verify code compliance. Working without a permit can result in fines, forced removal of finished work, and problems when selling your home. Confirm requirements with your local building department before starting.
How long does kitchen plumbing work take during a remodel?
Rough-in plumbing for a typical kitchen remodel takes one to three days, depending on complexity. Moving a sink or adding an island can extend this. Final connections for fixtures and appliances happen after cabinets and countertops are installed, usually adding another day. Inspections may add scheduling delays. Coordinate plumbing with other trades so you’re not waiting on one contractor before the next can start. A clear project timeline helps avoid downtime.