


Book An
Appointment
Lorem ipsum dolor sit amet, consectetur adipiscing elit, sed do eiusmod tempor incididunt ut labore et
Our Services
Table of Contents
- Burst Pipe Emergency Steps: The First 10 Minutes
- How to Shut Off Water to House: Finding the Main Valve Fast
- Locate the Leak and Assess the Damage
- Temporary Burst Pipe Repair: What You Can Patch and What You Shouldn’t
- Burst Pipe Water Damage Cleanup: Start Drying Before Mold Sets In
- Document the Damage and File Your Insurance Claim
- When to Call a Professional Plumber
- Prevent the Next Burst Pipe
- Frequently Asked Questions
Last Updated: October 17, 2026
Burst Pipe Emergency Steps: The First 10 Minutes
A burst pipe is a plumbing emergency where a pressurized water line splits or fails, releasing water fast enough to soak drywall, ruin flooring, and reach electrical fixtures within minutes. The difference between a soaked rug and a flooded house is almost always the first ten minutes. This guide covers what to do during a burst pipe, step by step, in the order that limits damage.
The first minute matters most, water spreads faster than most people expect.
Here are the three moves that stop the damage, in order:
- Shut off the main water supply
- Kill power to wet areas
- Drain the lines to relieve pressure
Never step into standing water near outlets, appliances, or a wet electrical panel. Water and live current are a lethal pair. Kill the breaker first, or stay out and call for help.
Step 1: Shut Off the Main Water Supply
Turning off the main shutoff valve is the fastest way to stop a burst pipe from flooding your home. Turn it clockwise until it stops, and flow to every fixture should halt within seconds.
Where it lives depends on your setup:
- Basement or crawlspace: near the front foundation wall
- Utility closet: close to the water heater
- Outdoors: in a ground box near the curb, sometimes needing a special key
Turn it firmly. Don’t force it past the stop point or you risk snapping an old handle.
Step 2: Kill Power to Wet Areas
Cut electricity to any room where water has reached outlets, switches, or appliances. Go to the breaker panel and flip the breakers for those zones. If the panel itself is wet or sparking, don’t touch it. Call an electrician or the power company.
Water plus live wiring causes shocks and fires. This step takes thirty seconds and prevents the worst outcome.
Step 3: Drain the Lines and Relieve Pressure
Open the cold taps on the lowest floor and flush every toilet once. This drains trapped water and relieves pressure inside the remaining pipes, reducing the chance of a second break. Expect some water to keep flowing for a minute or two, that’s the residual supply emptying out.
How to Shut Off Water to House: Finding the Main Valve Fast
Knowing how to shut off water to house takes less than a minute once you’ve located the valve, so find it before an emergency, not during one.
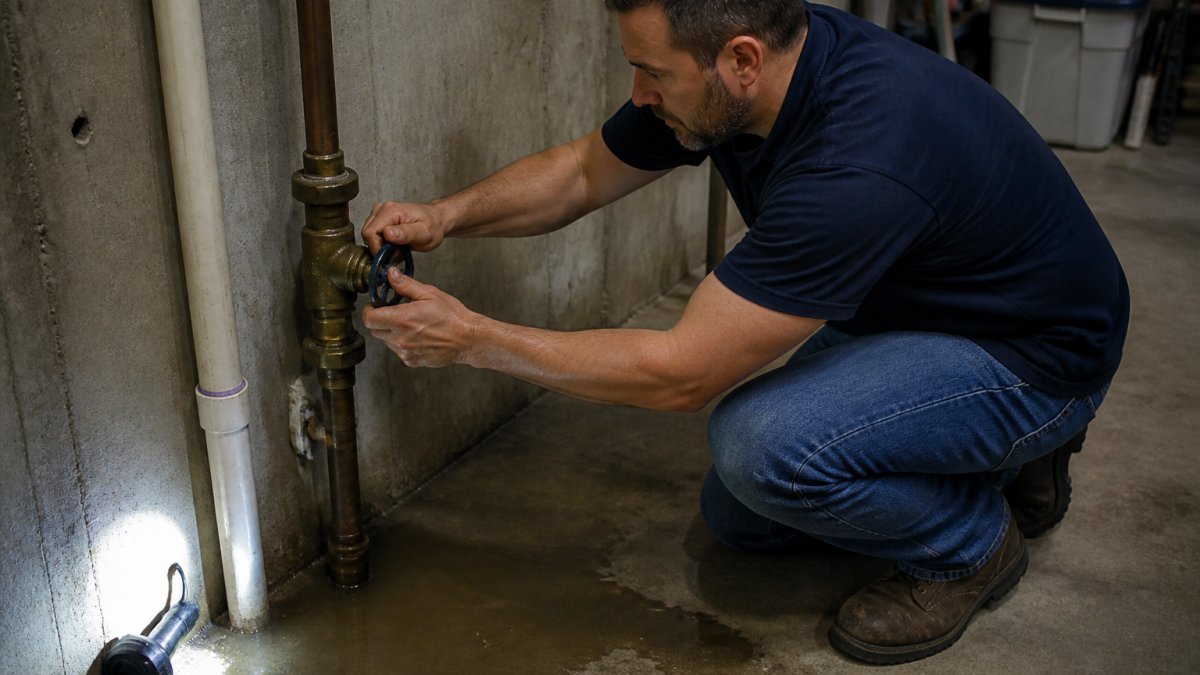
Here’s how to track it down:
- Follow the pipe from your water heater backward toward the wall
- Look for a brass or chrome lever or round wheel
- Check the meter box outside if there’s no indoor valve
A gate valve (round wheel) turns many rotations; a ball valve (lever) needs just a quarter turn, making it easier in a panic.
Label your main valve with a bright tag and snap a photo of its location. In a real emergency, adrenaline makes people forget. A photo on your phone saves precious minutes.
Locate the Leak and Assess the Damage
Finding the burst pipe is a process of elimination. The leak source is usually where the water is worst, not where it drips, water travels along joists, pipes, and framing before it shows. Shut off the main valve, let the flow stop, then work through the scenarios below.
Match the symptom to the pipe location
- Ceiling leak (water staining or bulging overhead): The burst is almost always on a supply line in the floor above, often under a bathroom or kitchen. Don’t poke a bulging ceiling while it’s full of water; place a bucket below, then pierce a small relief hole with a nail or screwdriver only after the main is off. A ceiling that sags or sounds spongy is a structural warning, stay out from under it.
- Wall leak (damp drywall, bubbling paint, musty smell): Supply lines behind walls usually spray; drain lines only leak when a fixture is used. Run a fixture upstairs and watch for the stain to grow, that points to a drain. A stain that spreads with no fixture running points to a pressurized supply line. Don’t open the wall until the water is off.
- Basement or crawlspace leak: Check exposed piping first, bursts often happen at fittings, elbows, and warm-to-cold transitions. A wet floor joist above the leak means water is running along the wood, not pooling at the source.
Distinguish clean supply water from contaminated water
This changes your cleanup and safety posture:
- Supply-line water (clean): Comes from a pressurized potable line, but once it contacts drywall, insulation, carpet, or soil, it degrades quickly. Treat it as clean only while it’s still on hard surfaces.
- Drain-line or wastewater backup (gray or black water): Contains soap, food residue, or sewage. Don’t wade in it, don’t use a wet/dry vac you’ll later use for food areas, and wear gloves and eye protection. If sewage is present, call a professional, this is not a DIY cleanup.
Assess severity in under a minute
Ask three questions:
- Is water still flowing? If yes, the main valve isn’t fully closed, go back to Step 1.
- Is the water near electrical fixtures, outlets, or the panel? If yes, keep the breaker off and stay out of the room until it’s dry and an electrician has checked it.
- Is the water rising or holding steady? Rising water means an active source you haven’t shut off. Steady water means you’ve stopped the supply and are now in containment mode.
Never tear into a wall, ceiling, or floor while water is still flowing. You risk a shock from hidden wiring, a collapse from saturated drywall, or a second burst from pressure you haven’t relieved. Shut off, drain, then investigate.
A moisture meter (a basic pin-type unit is widely available at hardware stores) lets you trace how far water has traveled behind baseboards and under cabinets, areas your hand can’t reliably check. Mark the wet boundary with painter’s tape so you can tell whether it’s spreading.
Temporary Burst Pipe Repair: What You Can Patch and What You Shouldn’t
A temporary repair is not a fix, it’s a controlled delay that buys time for a plumber. It only works when the leak is on an accessible, straight section of pipe, the pipe is fully depressurized, and the patch can be applied dry. If any of those fail, keep the main valve off and wait for a professional.
How a safe temporary patch actually works
Self-fusing silicone tape and pipe repair clamps work by compressing a sealing layer against the pipe wall. That seal depends on a clean, dry, smooth surface and near-atmospheric pressure, if water is still pushing through, the tape won’t bond and the clamp won’t seat.
A workable sequence for a pinhole or small crack on an exposed straight pipe:
- Confirm the main is off and the line is drained, open a downstream faucet and let it run dry.
- Dry and clean the pipe with a rag, then lightly scuff it with emery cloth or fine sandpaper to remove corrosion.
- Wrap self-fusing silicone tape starting an inch past the leak, overlapping by half the tape width, and finishing an inch past the other side. Pull it tight, the bond comes from stretch, not adhesive.
- Seat a repair clamp over the taped area if you have one, tightening evenly.
- Restore water slowly and watch the patch for the first few minutes. If it weeps, shut off immediately, do not add more tape over a wet patch.
What you should not attempt, and why
- A lengthwise split: Tape can’t resist the hoop stress of a pressurized split. The patch will balloon and fail, often suddenly.
- A joint or fitting failure: Fittings fail at threads and solder joints. Tape wrapped around a fitting doesn’t seal the actual failure point and can mask a leak that’s still spraying inside a wall.
- Anything behind drywall or under a slab: You can’t dry the surface or confirm the seal. You’ll spend time you don’t have and risk a hidden leak that keeps damaging the structure.
A temporary patch is not insurance against a second burst. If the pipe failed once from pressure or corrosion, the same condition can split it again a few feet away. Keep water use minimal until a plumber inspects the line, and know where the main valve is at all times.
If you can’t dry the pipe, reach the leak, or fully stop the flow, don’t patch, contain. Buckets, towels, and a call to a plumber beat a failed patch that floods the room a second time.
Burst Pipe Water Damage Cleanup: Start Drying Before Mold Sets In
Water damage cleanup starts the moment the flow stops. Mold can begin growing on wet materials within a day or two, so drying fast is the whole game.
Work through this:
- Soak up standing water with towels, a wet/dry vac, or buckets
- Pull up wet rugs and move furniture off wet floors
- Open windows and run fans to circulate air
Check for hidden moisture with a moisture meter along baseboards and under cabinets. If a room stays damp after a day of fans, call in a pro with drying equipment, mold prevention is cheaper than mold removal.
The clock on mold starts ticking the moment water touches drywall and wood. Drying within the first 24 to 48 hours is your best defense.
Document the Damage and File Your Insurance Claim
Document everything before you clean or repair. Most homeowners’ policies cover sudden burst pipe damage, but the claim lives or dies on your records. Photograph and video every wet area, damaged item, and the leak itself.
Your documentation checklist:
- Wide and close-up photos of all water damage
- Video walkthrough of each affected room
- Receipts for any damaged valuables
Call your insurer promptly and ask what they need. Keep every receipt. Don’t throw out damaged items until the adjuster says you can.
Don’t make permanent repairs before the adjuster sees the damage. Patching over the evidence can get your claim reduced or denied.
When to Call a Professional Plumber
Call a professional plumber when the leak won’t stop, the pipe is behind a wall or under a slab, or you can’t safely reach the shutoff.
Reach out right away if:
- The main valve won’t close fully
- Water is spraying and won’t stop
- The leak is in a ceiling, slab, or buried line
We handle emergency calls and use advanced tools like sewer camera inspection to find hidden problems fast. Our team serves homes and businesses across Pinellas County, and we’re family and locally owned.
Prevent the Next Burst Pipe
Prevention comes down to pressure, temperature, and pipe condition, most bursts are predictable.
- Insulate exposed pipes in garages, crawlspaces, and attics
- Keep the heat on during cold snaps, even when away
- Disconnect garden hoses before the first freeze
A little maintenance now beats a flooded floor later. If you’re unsure about your pipes, a quick inspection gives you peace of mind.
Frequently Asked Questions
What should I do first if a pipe bursts in my home?
Shut off the main water supply immediately. Every minute the water runs adds to the flooding, so the shutoff valve is the first priority, not the leak itself. Once the water stops, cut power to any wet area at the breaker, then open cold taps to drain the lines. After that, call a licensed plumber and start catching water with buckets. If water is near outlets, switches, or a ceiling, stay out of the room until the power is off.
How urgent is a burst pipe, and should I call an emergency plumber?
Treat it as urgent. A burst pipe can release hundreds of gallons in an hour, and water damage spreads into drywall, flooring, and framing quickly. Call an emergency plumber if the leak is behind a wall, under a slab, near the electrical panel, or if you cannot find the shutoff valve. For a slow drip from an accessible pipe that you have already isolated, a same-day appointment is usually enough. CW Plumbing offers emergency service for burst pipe situations.
Can I temporarily repair a burst pipe before a plumber arrives?
Sometimes, but only after the water is off. A pipe clamp or fiberglass repair wrap can hold a pinhole or short split on a straight run of accessible pipe long enough for the plumber to arrive. Skip this for a split longer than about an inch, a joint failure, or a pipe inside a wall or ceiling. Never patch a pipe that is still pressurized, and never use tape alone on a burst section.
What should I do about water near electrical outlets?
Do not touch anything in the wet area. Go to the breaker panel and switch off the circuit serving that room, plus any circuit you are unsure about. If the panel itself is wet or you must stand in water to reach it, leave it alone and call an electrician or the utility. Once power is off, unplug nothing until the area is dry. Water and live current together are the most dangerous part of a burst pipe.
A burst pipe can turn a normal day into a flooded mess, but fast action keeps the damage contained. CW Plumbing is here for the moments you can’t handle alone, with emergency service, advanced leak detection, and a team that treats your home like our own. Book an appointment with CW Plumbing and get your plumbing back to safe and dry.