


Book An
Appointment
Lorem ipsum dolor sit amet, consectetur adipiscing elit, sed do eiusmod tempor incididunt ut labore et
Our Services
Table of Contents
- Act Immediately: Assess the Leak and Severity
- How to Shut Off Water to Your House
- Isolate the Affected Fixture or Branch Line
- Contain Water Damage and Protect Your Belongings
- Using a Pipe Repair Clamp for a Temporary Seal
- How to Stop a Bathroom Sink Leak Temporarily
- What to Do Before the Plumber Arrives
- When to Call for Emergency Help and What Not to Do
- Frequently Asked Questions
Last Updated: October 14, 2026
Act Immediately: Assess the Leak and Severity
The first few minutes after discovering a water leak determine how much damage occurs, which is why calling a water leak plumber immediately is critical.
Start by identifying where the water is coming from. Look for visible dripping, spraying, or pooling water. Is it coming from under a sink, near a water heater, or from the ceiling?
Next, assess how severe the leak is. A slow drip is different from a burst pipe spraying water across a room. Severe leaks require faster action and may need emergency help immediately.
Identify the leak source and severity
A minor leak drips slowly and may go unnoticed for hours. You might see water stains, hear dripping sounds, or notice damp spots. These leaks still need attention but give you time to work.
A major leak sprays water or flows steadily from a pipe or fixture. A burst pipe is the most serious type. Water damage spreads quickly with major leaks, and you may need emergency help right away.
Common leak locations include:
- Under bathroom and kitchen sinks
- Around toilet bases
- Near water heater connections
- At pipe joints and fittings
- Inside walls (harder to spot until damage appears)
Safety first: Check for electrical hazards and contaminated water
Before you touch anything near the leak, look for electrical hazards. Water and electricity are a dangerous combination.
Check if the leak is near electrical outlets, light switches, or appliances. If water is spraying toward or pooling near electrical equipment, turn off power to that area at your circuit breaker immediately. Do not touch wet electrical equipment.
Some leaks involve contaminated water. If the leak comes from a sewer line, toilet overflow, or drain, the water contains harmful bacteria. Wear gloves and avoid direct contact. Wash your hands thoroughly after handling contaminated water.
If water is actively spraying onto electrical outlets or appliances, turn off power at the breaker first. Do not attempt repairs near live electrical equipment.
How to Shut Off Water to Your House
Stopping the water flow is your most critical step. Every second counts when water is pouring into your home.
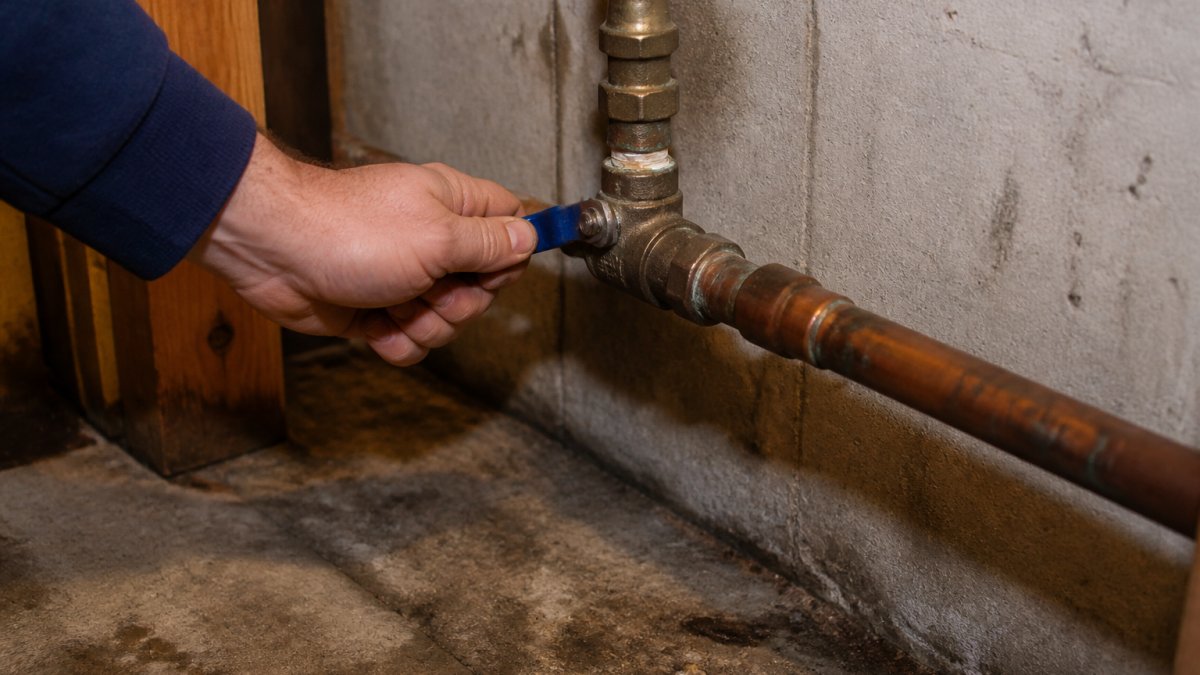
The main shut-off valve controls all water entering your house. Closing it stops the leak immediately. Most homes have two shut-off locations: one at the water meter (outside) and one inside near where the water line enters the building.
Locating your main shut-off valve
Your main shut-off valve is usually located in one of these places:
- Basement or crawl space: Look along the foundation wall where the water line enters
- Utility room or mechanical room: Near the water heater or furnace
- Garage: Often near the foundation or exterior wall
- Outside: At the water meter box, buried slightly below ground level
The valve is typically a lever handle or a round knob. A lever handle turns side-to-side. A round knob turns clockwise.
To shut off water, turn the lever handle perpendicular to the pipe or turn the knob clockwise until it stops. You should feel resistance.
After closing the valve, open a faucet upstairs to release remaining water pressure. This helps confirm the valve worked and drains water still in the pipes above.
Mark your shut-off valve location with bright tape or paint so everyone in your household knows where it is. In an emergency, you will not have time to search.
If you cannot find the main valve
Some homes have shut-off valves that are hard to locate or stuck from age. If you cannot find your main valve or it will not turn:
- Look for a secondary shut-off near the water meter (usually outside)
- Check if your water meter has an isolation valve you can close
- Turn off the water supply at individual fixtures near the leak (see next section)
- Call a professional immediately if the leak is severe
Do not force a stuck valve. Forcing it can break the valve and make the problem worse.
Isolate the Affected Fixture or Branch Line
If the leak is from a single fixture, a bathroom sink, toilet, or shower, you can shut off water to just that fixture instead of the whole house.
Look under the sink or behind the toilet. You should see shut-off valves on the water lines coming into that fixture. These are smaller than the main valve and control only that fixture.
Turn the valve clockwise until it stops. Then test the fixture by turning on the faucet or flushing the toilet. Water should not flow.
If the fixture has no shut-off valve or the valve is stuck, use the main shut-off valve instead.
Contain Water Damage and Protect Your Belongings
While waiting for a plumber, stop water from spreading through your home.
Move items away from the leak. Furniture, electronics, and personal belongings absorb water and suffer damage.
Use towels, buckets, or a wet vacuum to catch and remove standing water.
Open windows and doors to increase air flow. Wet environments encourage mold growth (the CDC).
Place a bucket or tarp under the leak to catch dripping water. This protects floors and makes cleanup easier.
Document the damage with photos and video. Take pictures of the leak itself, the water damage, and any items affected.
The first priority is stopping water flow. The second priority is removing standing water and drying the area to prevent mold and structural damage.
Using a Pipe Repair Clamp for a Temporary Seal
A pipe repair clamp is a temporary fix that can stop small leaks for a few hours while you wait for a plumber. It is not a permanent solution.
A pipe clamp has a rubber pad that presses against the leak and a metal band that tightens around the pipe. The pressure creates a seal that stops water flow temporarily.
To use a pipe clamp:
- Dry the pipe completely with a towel
- Position the rubber pad directly over the leak
- Wrap the metal band around the pipe
- Tighten the bolts on the clamp with a wrench, alternating side to side
- Tighten until water stops flowing (do not over-tighten)
Check the clamp every 15 minutes. If water starts flowing again, tighten it more. Monitor the repair constantly, clamps can slip or fail suddenly.
When to use a repair clamp and material compatibility
A pipe clamp works best for small pinhole leaks or slow drips in metal pipes (copper or steel). It does not work well on plastic pipes or for large cracks.
Do not use a clamp on:
- Burst pipes or large cracks
- Plastic (PVC or PEX) pipes
- Threaded connections or pipe joints
- Areas where the pipe is severely corroded
Clamps are temporary only. They may hold for hours or days, but they will fail eventually. Use a clamp to buy time while you arrange for professional repair. Do not rely on it as a permanent fix.
How to Stop a Bathroom Sink Leak Temporarily
Bathroom sink leaks are common and often fixable with simple steps.
The most frequent leaks occur under the sink where supply lines connect to the faucet. Water drips onto cabinets and floors, causing rot and mold.
Common bathroom leak locations
Leaks under bathroom sinks happen at:
- Compression fittings where supply lines connect
- The faucet body itself
- The P-trap (the curved pipe below the drain)
- Caulk around the faucet base
Identify which part is leaking by looking under the sink with a flashlight.
Quick fixes for under-sink leaks
For a leaking compression fitting:
Use an adjustable wrench to tighten the nut where the supply line meets the shut-off valve. Turn clockwise a quarter turn at a time.
For a leaking faucet body:
The faucet itself may need replacement. As a temporary measure, place a bucket under the leak to catch water.
For a leaking P-trap:
The curved pipe under the sink collects debris and can crack or develop pinhole leaks. Place a bucket underneath to catch water.
For leaks around the faucet base:
Dry the area completely and apply plumber’s tape or epoxy putty around the base. This is temporary.
Quick bathroom sink fixes work best for minor drips from loose connections. For major leaks or faucet damage, call a professional plumber immediately.
What to Do Before the Plumber Arrives
Preparing for the plumber’s arrival saves time and money. The more information you provide, the faster they can diagnose and fix the problem.
Documentation and preparation steps
Before the plumber arrives:
- Take photos and video of the leak from multiple angles
- Note when the leak started and how fast water is flowing
- Identify the leak source clearly (fixture, pipe location, visible damage)
- Write down what you have already tried (shut-off valve closed, temporary clamp applied, etc.)
- Clear the area around the leak so the plumber has room to work
- Move furniture and belongings away from the affected area
- Have your water meter information ready (location, account number)
- Know your home’s age and plumbing type (copper, PVC, galvanized steel)
- Prepare to answer questions about recent plumbing work or renovations
This information helps the plumber understand the problem immediately and bring the right tools.
When to Call for Emergency Help and What Not to Do
Some leaks require emergency response. Do not wait if any of these apply:
- Water is spraying from a burst pipe
- Water is pooling inside walls or ceilings
- Water is near electrical equipment or outlets
- The leak is flooding your basement or ground floor
- You smell gas or sewage with the water
- The leak is from a sewer line
Call a professional plumber immediately in these cases. The longer you wait, the more damage spreads.
What not to do:
Do not ignore a leak hoping it will stop on its own.
Do not use permanent sealants like epoxy or plumber’s putty for more than a few hours.
Do not attempt to repair threaded pipe connections yourself unless you have plumbing experience.
Do not turn water back on until the leak is fully repaired.
Do not wait for a convenient time to call a plumber if water is actively leaking.
At CW Plumbing, we understand that water leaks are stressful and time-sensitive.
A water leak demands immediate action.
Frequently Asked Questions
What are the first steps to take when you discover a water leak?
First, identify where the water leak is coming from and assess its severity. If it’s a major leak or burst pipe, shut off the main water supply immediately by locating your main shut-off valve (usually near the water meter or where the main line enters your home) and turning the handle clockwise. For minor leaks, you may isolate just the affected fixture using its shut-off valve. Once water is controlled, contain the leak by placing buckets underneath and moving belongings away from the water damage area. Then contact a plumber for professional repair.
Can I use a pipe repair clamp to stop a water leak temporarily?
Yes, a pipe repair clamp can provide a temporary seal for small leaks on rigid pipes like copper. Position the rubber patch over the leak location, then tighten the clamp bolts evenly until snug (do not over-tighten). This temporary repair is suitable for minor leaks while you wait for professional help, but it is not a permanent solution. Repair clamps work best on straight pipe sections and may not seal effectively on corroded pipes or at joint connections. Always monitor the repair and have a professional plumber assess the damage.
How do I shut off water to a specific fixture like a bathroom sink?
Look under the sink for isolation shut-off valves on the hot and cold supply lines. Turn both valves clockwise until they stop. If the fixture shut-off valves are stuck or missing, you will need to shut off the main water supply to the house. This is why it is important to know where your main shut-off valve is located before an emergency occurs.
What should I prepare before the plumber arrives?
Turn off the main water supply if you have not already done so. Document the leak location and any water damage with photos or video for insurance purposes. Clear the area around the leak so the plumber has easy access. Have your water meter location and main shut-off valve location identified. If possible, note when the leak started and whether it is continuous or intermittent. Gather any relevant information about your plumbing system, such as the age of your pipes or previous plumbing issues. This preparation speeds up diagnosis and repair.