


Book An
Appointment
Lorem ipsum dolor sit amet, consectetur adipiscing elit, sed do eiusmod tempor incididunt ut labore et
Our Services
Last Updated: November 11, 2026
Quick Summary
To fix leaking pipe problems in Pinellas Park, first shut off the main water valve, usually near the water meter or where the line enters the house, and turn it clockwise until it stops. Then locate the leak, drain pressure, and call a licensed plumber if the leak is inside a wall, under a slab, or on a line you cannot reach safely.
- Turn the main shutoff valve clockwise until it stops before doing anything else.
- Open the lowest faucet in the house to drain remaining pressure.
- Use the water meter check: turn off all water, wait one hour, and reread the meter.
- Never use duct tape on a pressurized supply line; use products rated for potable water.
- Call a plumber if water has run for hours, reached electrical components, or the valve will not close.
Table of Contents
- Shut Off the Water First: Immediate Steps Before a Plumber Arrives
- Pipe Leak Detection: Finding the Real Source of the Water
- Tools, Materials, and What You Need for a Simple Pipe Repair
- Temporary Pipe Leak Repair Steps for Accessible Pipes
- Limits of Temporary Patches and When Licensed Work Is Required
- Pinellas Park Water Shutoff Locations, Permits, and Local Guidance
- Booking a Pinellas Park Plumber for Your Leak Repair
- Frequently Asked Questions
Shut Off the Water First: Immediate Steps Before a Plumber Arrives
A leaking pipe in Pinellas Park can soak floors, cabinets and drywall within hours. Your first job is to stop the water, not to find the exact crack. Locate your main shutoff valve, usually near the water meter or where the line enters the house, and turn it clockwise until it stops. If a single fixture is leaking, close its local shutoff valve under the sink or behind the toilet first.
Next, cut power to any area where water is near outlets or appliances. If water is touching electrical components, leave the area and call an electrician or your utility. Open the lowest faucet in the house to drain remaining pressure, then place towels, buckets and a wet-dry vacuum where the water is collecting.
If the leak is serious, call a plumber right away. For the full emergency sequence, see emergency steps to stop a water leak until the plumber arrives. You can also review our guide on what to do during a burst pipe for the full emergency sequence.
Pipe Leak Detection: Finding the Real Source of the Water
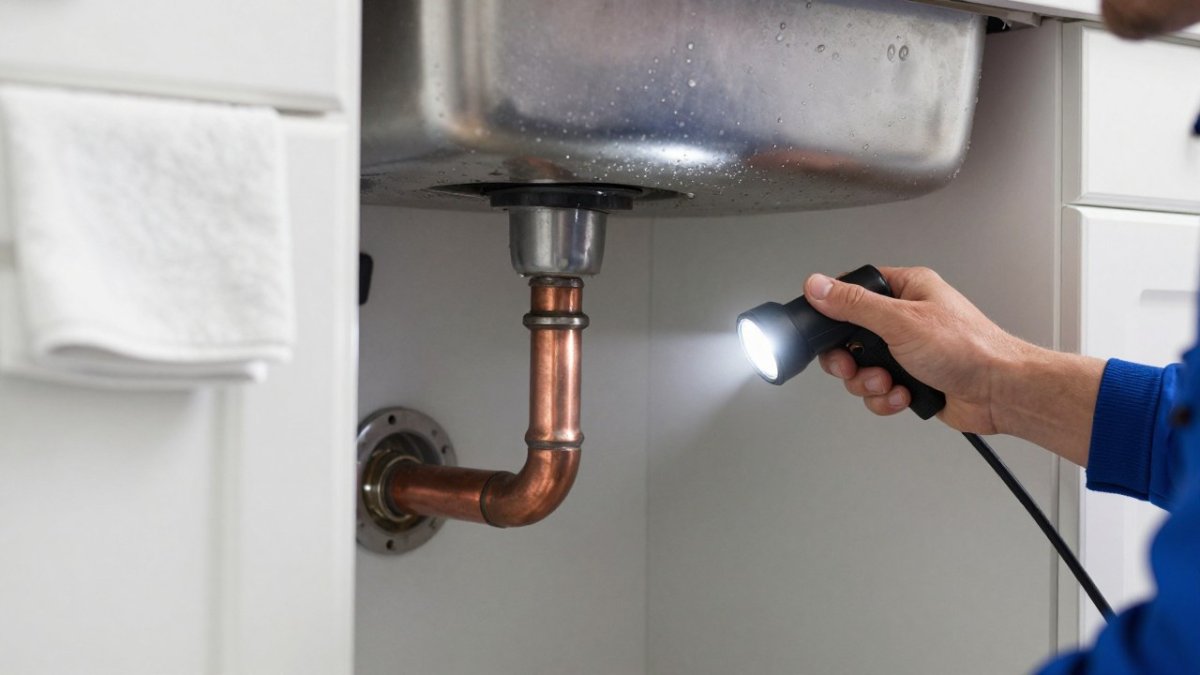
Finding a leak is often harder than fixing it. Water travels along pipes and joists, so the wet spot on the ceiling may be several feet from the actual break. Start by checking every visible connection, valve and joint for drips, rust or mineral crust. Dry the area with a towel, then watch it for several minutes to see where moisture returns.
A simple test is the water meter check. Turn off every faucet, appliance and toilet, then read the meter. Wait one hour and read it again. If the reading has moved, water is still flowing somewhere in the system. The U.S. Environmental Protection Agency’s WaterSense program offers guidance on monitoring household water use.
If the meter keeps moving with everything off, the leak is likely underground or inside a wall. That is when professional leak detection with specialized equipment becomes the practical choice.
Pipe Leak or Fixture Leak? How to Tell the Difference
A pipe leak comes from the supply or drain line itself, usually at a joint, crack or corroded section. A fixture leak comes from a faucet, valve stem, toilet fill valve or flapper. Check whether the water appears only when the fixture is in use. A faucet that drips constantly with the handle off is usually a fixture problem. Water that appears under a cabinet with no fixture running points to the pipe.
Condensation Versus a Real Leak
Cold water pipes sweat on humid days in Florida, and the moisture can look like a leak. Wipe the pipe dry and check it again after thirty minutes. If the surface stays dry, condensation is the likely cause. If the drip returns from one specific spot, you have a real leak.
Tools, Materials, and What You Need for a Simple Pipe Repair
For a basic temporary repair on an accessible pipe, keep these items on hand: an adjustable wrench, pipe-repair tape, a rubber patch, a hose clamp, plumber’s epoxy putty, a towel, a bucket and a flashlight. Match the patch and clamp to the pipe diameter, which you can measure with a tape or caliper. Check the price at your local hardware store before you buy.
Avoid using standard duct tape. It does not hold up under water pressure. Use products rated for potable water and check the packaging for the pressure and temperature limits.
Temporary Pipe Leak Repair Steps for Accessible Pipes
A temporary repair is appropriate only when the leak is on an exposed pipe you can reach, the water is fully shut off, and the pipe is not part of a sewer line, main water line, or slab assembly. If the leak is inside a wall, under a slab, or on the service line between the meter and the house, stop here and call a licensed plumber. For urgent help with a burst line in the area, see emergency burst pipe repair in Pinellas County.
Before you start, confirm the pipe material. Copper, PEX, CPVC, and galvanized steel each behave differently under clamps and epoxy. A rubber patch and hose clamp work best on copper and galvanized steel with a clean, round exterior. PEX and CPVC are more easily crushed by over-tightened clamps, so hand-tighten plus a quarter turn is usually the limit.
- Shut off the main valve and open the lowest faucet in the house to drain residual pressure. Confirm the flow has stopped before cutting or patching.
- Dry the pipe with a rag, then scuff the surface lightly with emery cloth or fine sandpaper on metal pipe so the patch and epoxy can bond. Most sealants will not adhere to a wet or slick surface.
- Cut a rubber patch from an old inner tube or a plumbing repair sleeve so it wraps at least two inches past each side of the leak. A longer patch spreads clamp pressure and reduces the chance of crushing the pipe.
- Center the patch over the leak and secure it with a hose clamp or a stainless steel repair clamp. Tighten evenly, alternating sides, until the rubber just compresses, stop before the pipe deforms.
- If using plumber’s epoxy putty, knead it per the label, press it over the clamp and patch, and let it cure for the full time stated on the package. Most putties need 10 to 60 minutes before pressurization; do not shortcut the cure.
- Open the main valve slowly, about a quarter turn at a time, and watch the patch for 30 minutes. A slow ramp-up lets you stop immediately if the patch starts to weep.
Watch out: Do not use duct tape, electrical tape, or self-fusing silicone tape as a standalone repair on a pressurized supply line. These products are not rated for potable water pressure and can fail suddenly, sending water into cabinets or ceilings. Use only products labeled for potable water and check the package for pressure and temperature ratings.
Temporary repairs buy hours to days, not weeks. A patch on a corroded or cracked pipe can hold at low pressure and fail when a fixture or irrigation zone opens. If the patch weeps after pressurization, shut the water off again and call a plumber rather than adding more clamps or epoxy.
The table below summarises the temporary repair sequence and the key cautions for accessible pipes.
| Step | What to do | Key detail |
|---|---|---|
| 1. Shut off | Close the main valve and open the lowest faucet | Confirm flow has stopped |
| 2. Prepare surface | Dry and scuff metal pipe | Sealant needs a dry, rough surface |
| 3. Cut patch | Rubber patch from inner tube or sleeve | Wrap at least 2 inches past each side |
| 4. Clamp | Hose or stainless clamp, tighten evenly | Stop when rubber compresses |
| 5. Epoxy cure | Knead and press putty over clamp | Cure 10 to 60 minutes per label |
| 6. Slow pressurize | Open main a quarter turn at a time | Watch patch for 30 minutes |
Limits of Temporary Patches and When Licensed Work Is Required
Many homeowners see a patch hold for a day and assume the problem is solved. Pipes that are corroded, cracked along their length or old enough to have scale buildup often fail again. Leaks inside walls, under slabs, in main water lines or in sewer lines require licensed work. Licensing and permit requirements for plumbing work vary by jurisdiction, so check with the relevant state and local authorities before starting permanent repairs.
Call a professional if the water has been running for more than a few hours, the leak has reached electrical components, or you cannot shut off the valve. Mold can begin growing within 24 to 48 hours of water damage, so drying the area quickly matters (the EPA).
Pinellas Park Water Shutoff Locations, Permits, and Local Guidance
Your water bill or the meter box lid usually identifies the water provider. If you are unsure, contact your local utility billing office before an emergency, not during one.
The customer-side main shutoff is typically a gate valve or ball valve on the pipe between the water meter and the house. Ball valves need only a quarter turn; gate valves may take several turns and can seize if they have not been exercised in years. Test your valve before a leak happens, and if it will not close fully, ask a plumber to replace it.
If the leak is between the meter and your shutoff, meaning the utility side, do not dig or attempt a repair. Contact your water utility and report the leak.
Ask your local building department for the specific permit scope before work begins, and keep photos and receipts of any repair for insurance and resale records.
Watch out: Never open a meter box and turn the utility-side valve yourself unless a utility representative instructs you to. Shut off at your customer-side valve instead.
Booking a Pinellas Park Plumber for Your Leak Repair
When you call for leak repair, describe where the water is coming from, whether it is still flowing and whether you have already shut off the main. Ask about the diagnostic process, what the repair will involve and whether the price is a flat rate or depends on time and materials. Our team at CW Plumbing handles leak detection, pipe repair and emergency calls for homeowners across Pinellas County. If you are dealing with active water right now, contact CW Plumbing to schedule a visit.
Water damage gets worse with every hour it sits, so act now. CW Plumbing is a family and locally owned business serving Pinellas Park with leak detection, pipe repair and emergency plumbing. Book an appointment today and get a licensed plumber on the way.
Frequently Asked Questions
How much does it usually cost to fix a leaking pipe?
Costs depend on the pipe’s location, material, how much access the plumber has, and whether the damage is limited to one section or extends further. A simple repair at an exposed fitting is usually far less involved than work inside a wall or under a slab. Pricing depends on your specific situation. Contact CW Plumbing or visit the website for a current quote before work begins.
Can a leaking pipe be repaired without replacing it?
Often, yes. A small pinhole or a loose compression fitting can sometimes be sealed or tightened without replacing the whole run. Temporary patches can hold water back while you arrange permanent work, but they are not guaranteed to last. If the pipe is corroded throughout or the leak keeps returning, replacing the damaged section is usually the more reliable fix.
When should I call a plumber for a leaking pipe?
Call a licensed plumber right away if the leak is inside a wall, under a slab, on a main water line, or if you cannot shut off the water. Water damage and mold can develop quickly in Pinellas County’s humid climate. CW Plumbing offers emergency service, so you can reach out when a leak cannot wait for a scheduled appointment.
How can I tell whether a leak is coming from a pipe or a fixture?
Dry the area completely, then watch for drips or check the joints while all fixtures are off. Water that appears only when a faucet or toilet is in use usually points to a fixture problem. Water that continues with everything off, or that shows up along a pipe run, more likely indicates a pipe leak. Sweating or condensation on cold lines can look like a leak, so check whether the moisture is dripping or just beading on the surface.
